


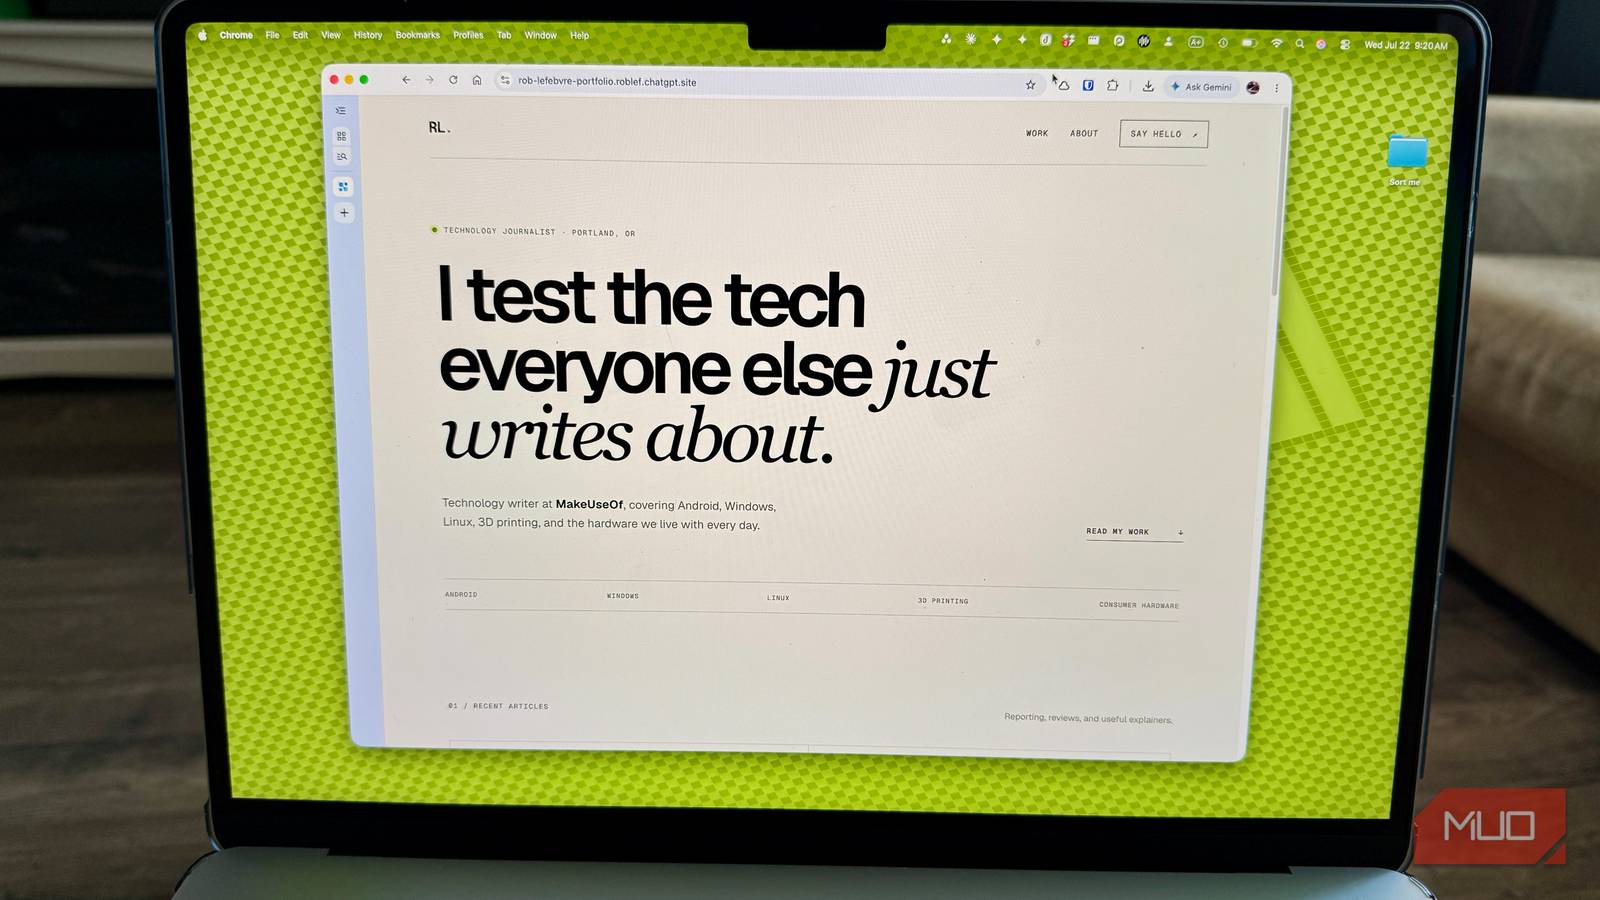

I described a personal portfolio site to ChatGPT, tagged Sites, and it built the whole thing in 11 seconds. A real, live, deployed website with working navigation, plausible placeholder content, and a layout I’d actually use. I didn’t touch any code. I didn’t open a hosting dashboard. I just typed a description and watched it happen.
Here’s exactly how to build a website with ChatGPT Sites, and what you need to know before you start.
What ChatGPT Sites actually does (it’s not what you expect)
ChatGPT Sites is a feature inside ChatGPT’s Work mode that builds and deploys websites from a text description. You tell it what you want, and it generates a fully styled, hosted page within seconds. No manual deployment step. No staging environment. It builds, self-tests, and pushes live in one pass.
The thing that caught me off guard: ChatGPT doesn’t wait for you to review the site before publishing. It deploys immediately. The good news is that the default access is set to private, meaning only you can see it. If someone else tries to load your URL, they get a 401 error. Nothing leaks. But you should still check your share settings right after it builds, because the site is already live whether you realize it or not.
The feature picked its own visual direction when I tested it. It chose an editorial typography style with warm off-white and near-black surfaces and a green accent. I never specified colors or fonts. It made design decisions on its own, and honestly, they were decent choices for a portfolio page.
ChatGPT Sites is not a full web development platform. You’re not going to build a complex web app with user authentication, databases, or e-commerce checkout flows. It’s best for landing pages, portfolios, simple business sites, and content pages where the structure is relatively straightforward.
What you need before you start
You’ll need a ChatGPT Plus subscription, which costs $20 per month. Sites only works inside Work mode, and Free or Go-tier accounts don’t have access to it. If you’re already paying for Plus, there’s no extra cost.
Beyond the subscription, there’s nothing else you strictly need. No domain name required (ChatGPT provides a URL), no hosting account, no design software. Just a clear idea of what you want your site to contain.
For contact forms, you’ll eventually want a free account with a service like Formspree, which handles form submissions without requiring any backend code. But you can build the site first and add that later.
How to build your first website with ChatGPT Sites
Step 1: Open ChatGPT and switch to Work mode. You’ll see it as a tab or toggle in the interface.
Step 2: Write a clear description of the site you want. Be specific. Don’t just say “build me a website.” Describe the sections, the content you want, the purpose, and the audience. Here’s an example prompt:
“Build a personal portfolio site for a freelance writer named Alex. Include a hero section with a short bio, a section with 4 placeholder article cards, a services section listing content writing, copywriting, and editing, and a contact section. Use a clean, minimal style.”
The more detail you give, the better the output. Vague prompts produce generic sites that look like every other template.
Step 3: Tag @Sites in your message to trigger the feature. ChatGPT reads your description, picks a visual direction, builds the HTML and CSS, and deploys it. The whole thing takes around 10-15 seconds.
Step 4: Check the generated URL immediately. Click through the site and verify that all sections are there. Remember: the site is already live and accessible to you. Check that the share settings are set to private before you make any changes.
Step 5: Request edits through chat. Want different colors? Ask. Need to change the headline? Tell it. Want to rearrange sections? Describe the new order. ChatGPT rebuilds and redeploys with each change.
Step 6: Replace placeholder content with real information. This is the part that requires your attention. ChatGPT creates surprisingly convincing placeholder text — article headlines, descriptions, and bios that read like real content. Swap in your actual work, real links, and accurate information before making the site public.
Step 7: Make the site public. In the share settings, change visibility from private to public. Test the URL from an incognito browser to confirm it’s accessible to anyone.
Adding a real contact form (the tricky part)
This is where things get slightly more involved. The default contact “form” that ChatGPT builds is usually just a styled mailto link, which opens your email client when clicked. That works, but it’s not a real form.
To get an actual form with fields for name, email, and message, you’ll need to connect it to an external service. Here’s how:
First, create a free account on Formspree (or a similar form backend service). Set up a new form and copy the endpoint URL it gives you.
Then, ask ChatGPT to replace the mailto link with a proper HTML form. Give it your Formspree endpoint. ChatGPT will wire up the form with field validation, spam protection, and a success message.
One thing ChatGPT got right: it refused to fake the integration. When I tried to use a personal Gmail address as the sender, it told me flatly that it wouldn’t work and explained why (you don’t control Gmail’s domain). When I didn’t have a proper email API, it walked me through the Formspree setup instead of making something up. That’s actually useful honesty from an AI tool.
Things ChatGPT Sites does surprisingly well
The visual design is better than most no-code builders at this price point. It doesn’t just slap content into a Bootstrap template. It makes real decisions about spacing, typography hierarchy, and color contrast.
Content generation is maybe too good. When I asked for placeholder articles, it wrote headlines like “What I learned from a month of failed prints” and “The honest guide to buying a mini PC.” These sounded like real articles I might have written. If you’re not careful, you could accidentally publish fabricated content under your name because it’s so convincing.
The iterative editing process is smooth. You don’t need to learn a visual editor or understand CSS. Just describe what you want changed, and ChatGPT handles it. It’s faster than opening Figma, adjusting a layout, exporting code, and deploying.
What it still can’t do
Don’t expect a working blog with a CMS. Don’t expect user accounts, payment processing, or database-driven content. ChatGPT Sites produces static pages. They look good and they load fast, but they’re not interactive applications.
Multilingual sites need manual work. You’d have to describe each language version separately and manage the navigation yourself.
Custom domains require additional setup outside of ChatGPT. The default URL is a chatgpt.com subdomain, which works fine for personal projects but doesn’t look professional for a business.
If you’re looking to build something more complex, check out our guide on how to build an AI content pipeline for a broader content automation approach, or read our vibe coding career guide for learning AI-assisted development that goes beyond simple page builders.
The bottom line: ChatGPT Sites won’t replace a web developer or a full website builder. But if you need a landing page, portfolio, or simple business site and you want it done in under a minute, it’s the fastest option I’ve tested. Just be specific in your prompt, watch the placeholder content, and double-check those share settings.